


How to Change out Skid Steer Tracks
Posted by Mackenzi Griffin on 22nd Jul 2024
Are your loader’s tracks starting to look a little worn out? Cracks, cuts, tears, and missing lugs are all visual indicators that it’s time for a swap. If your skid steer is slipping more frequently, especially on inclines or during heavy pushing, the tracks may have lost their grip.
Over time, tracks stretch and start to lose tension, so if you find yourself frequently adjusting the tension and it doesn’t hold, the tracks might be too worn. Increased vibration and unusual noises during operation like popping can indicate uneven wear or damage.
The lugs (the part of the track that engages with the sprockets) are crucial for traction. If they are broken or missing, it’s time for new tracks.
Fortunately, the process isn’t too difficult if you’ve got the right tools.
Here is a list of tools that you need to change a skid steer or excavator track:
- Replacement track
- Pry bar or sledgehammer
- Grease gun
- Socket wrench set
- Jack
Changing the Track
Once you have all of those things, here is how you get it done.
Park the machine on a flat, level surface.
Turn off the engine and remove the key.
Engage the parking brake.
Use a jack and make sure it’s securely lifted for safety.
Place wood blocks on the ground at the back of the machine, then slowly and gently lower the machine onto the blocks.
Release Track Tension
Locate the grease fitting on the track tensioner.
Use the grease gun to release tension by removing grease from the fitting. This will loosen the track.
Remove the Old Track
Use a pry bar or sledgehammer to carefully work the track off the sprockets and idlers. Start at the bottom and work your way around, be careful not to damage the undercarriage components.
Install the New Track
Position the new track around the sprockets and idlers. This can be tricky, so take your time and ensure make sure it’s aligned properly.
Use the pry bar to help guide the track into place.
Tighten the Track
Once the track is in place, use the grease gun to add grease to the tensioner fitting. This will tighten the track. Check the track tension by lifting it; there should be a slight sag in the middle.
Lower the Skid Steer
Carefully and safely lower the skid steer back to the ground.
Final Checks
Start the skid steer and move it forward and backward a few feet to ensure the track is seated correctly.
Recheck the tension and adjust if necessary.
Always follow the OEM specs and instructions in your skid steer's manual.
Take your time. Rushing the job can lead to mistakes or injuries. Patience is key.
Putting A Track on Incorrectly
Putting your skid steer track on incorrectly can lead to several issues, some of which can be quite serious. There are a couple ways to tell if your track is not aligned.
It may not be seated properly on the sprockets and idlers. If necessary, release the tension using the grease fitting on the track tensioner to remove the track and inspect for proper installation.
Carefully realign and reinstall the track, ensuring it is properly seated on all components.
Test the Installation
After reinstalling the track, test the skid steer by moving it forward and backward to ensure the track stays in place and operates smoothly.
If you're unsure about any part of the process, refer to your skid steer’s operator manual or seek assistance from a professional technician.
Preventive Measures
Double-Check During Installation. Take your time to ensure everything is aligned correctly and the track tension is set properly.
Regularly inspect the tracks and undercarriage components for signs of wear or misalignment.
There are also tools available that make changing tracks much faster and easier. After all, the most difficult and physically straining part is removing the track from the rollers and the sprockets. With these tools you can do it in half the time with way less effort.
Swapping tracks doesn’t have to be so manual and back-breaking. There are a lot of great tools to lighten the load and save you a lot of time, so you can go back to operations as usual.
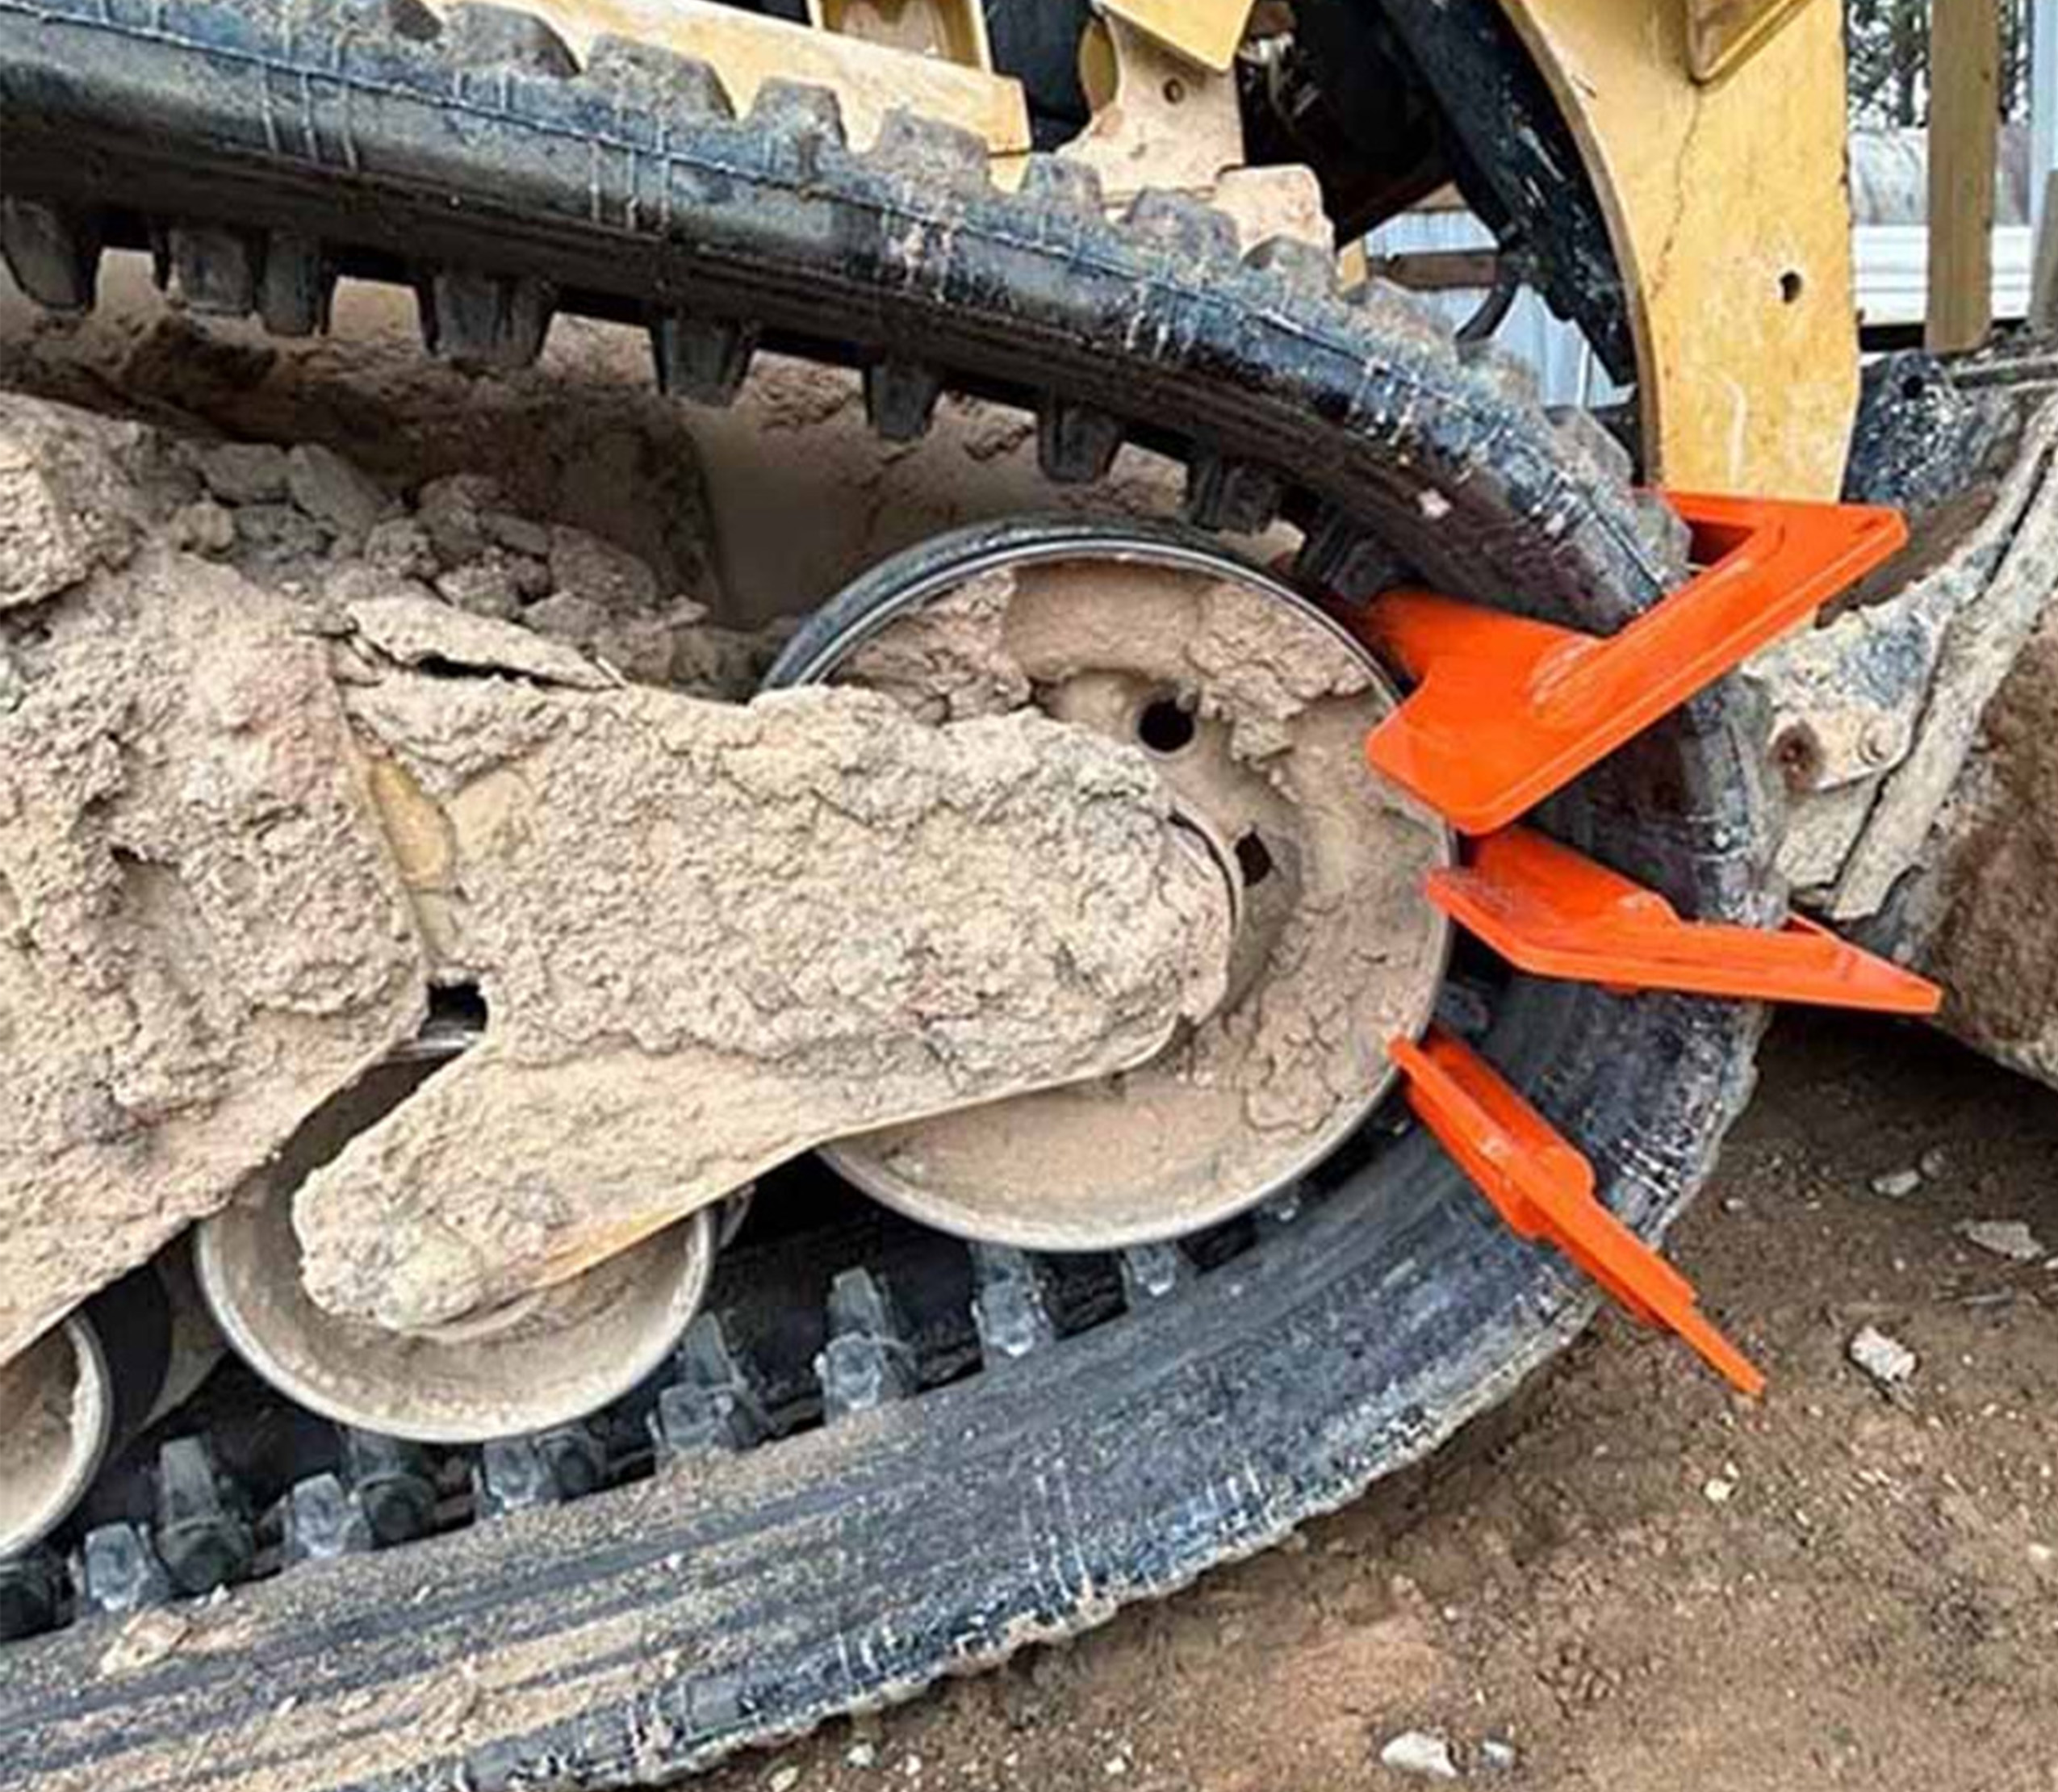
The Track Bar Repair Tool
This simple, yet effective tool slips tracks off the sprockets, all you have to do is roll the tracks forward a bit and lift them off. Here’s how it works.
Position the Tool
Slide the bars of the Repair Tool over the tread. Check that the bars are spaced so that there’s an empty tooth in between. You need this spacing to get the most leverage for the tool to dislodge the track teeth from the idler and sprockets.
Dislodge the Track
Position your pry bar in the sprocket and start up the skid steer. Walk the track backward, letting the Track Bar Repair Tool apply tension, and move the idler inward, loosening the track further.
Put the pry bar under the track and have the operator move the track forward. The tool will help lift the track off the rollers and idlers.
Remove and Replace the Track
Lift the old track off and position the new track onto the sprocket and idler. Slide the tool into the gaps of the new track to help guide it into place.
Reinstall the Track
Use the Track Bar Repair Tool to ensure the track aligns correctly with the sprockets and idlers.
Move the skid steer forward or backward to seat the track properly, the tool will guide the track back onto the idlers.
Adjust Track Tension
Clean the grease valve and access opening, then reattach and tighten the valve. Use the grease gun to add grease to the tensioner fitting, tightening the track.
Make sure the track has a slight sag in the middle when properly tensioned.
Lower the Skid Steer
Carefully lower the skid steer back to the ground.
Final Checks
Start the skid steer and move it forward and backward to ensure the track is seated correctly.
Make any necessary adjustments to ensure proper alignment and tension.
Replace the Protective Cover
Once the track is correctly installed and tense, reattach the access cover using a socket wrench.
The Track Handler 5 Piece Kit
Track Handler Kits are a safe and convenient way to change or replace your skid steer or excavator tracks. This kit allows you to swap your tracks on the spot without having to stop work and wait for an expensive service call.
Track handler products work on all major brands of skid loader, excavator, mini excavator, and compact skid loader equipment.
Preparation
Make sure your machine is secure and only off the ground by 3-4". Only one side of the machine should be off the ground during this process. Some machines require more clearance than that so, you’ll want to check your machine manual for instructions.
What’s Included in the Kit
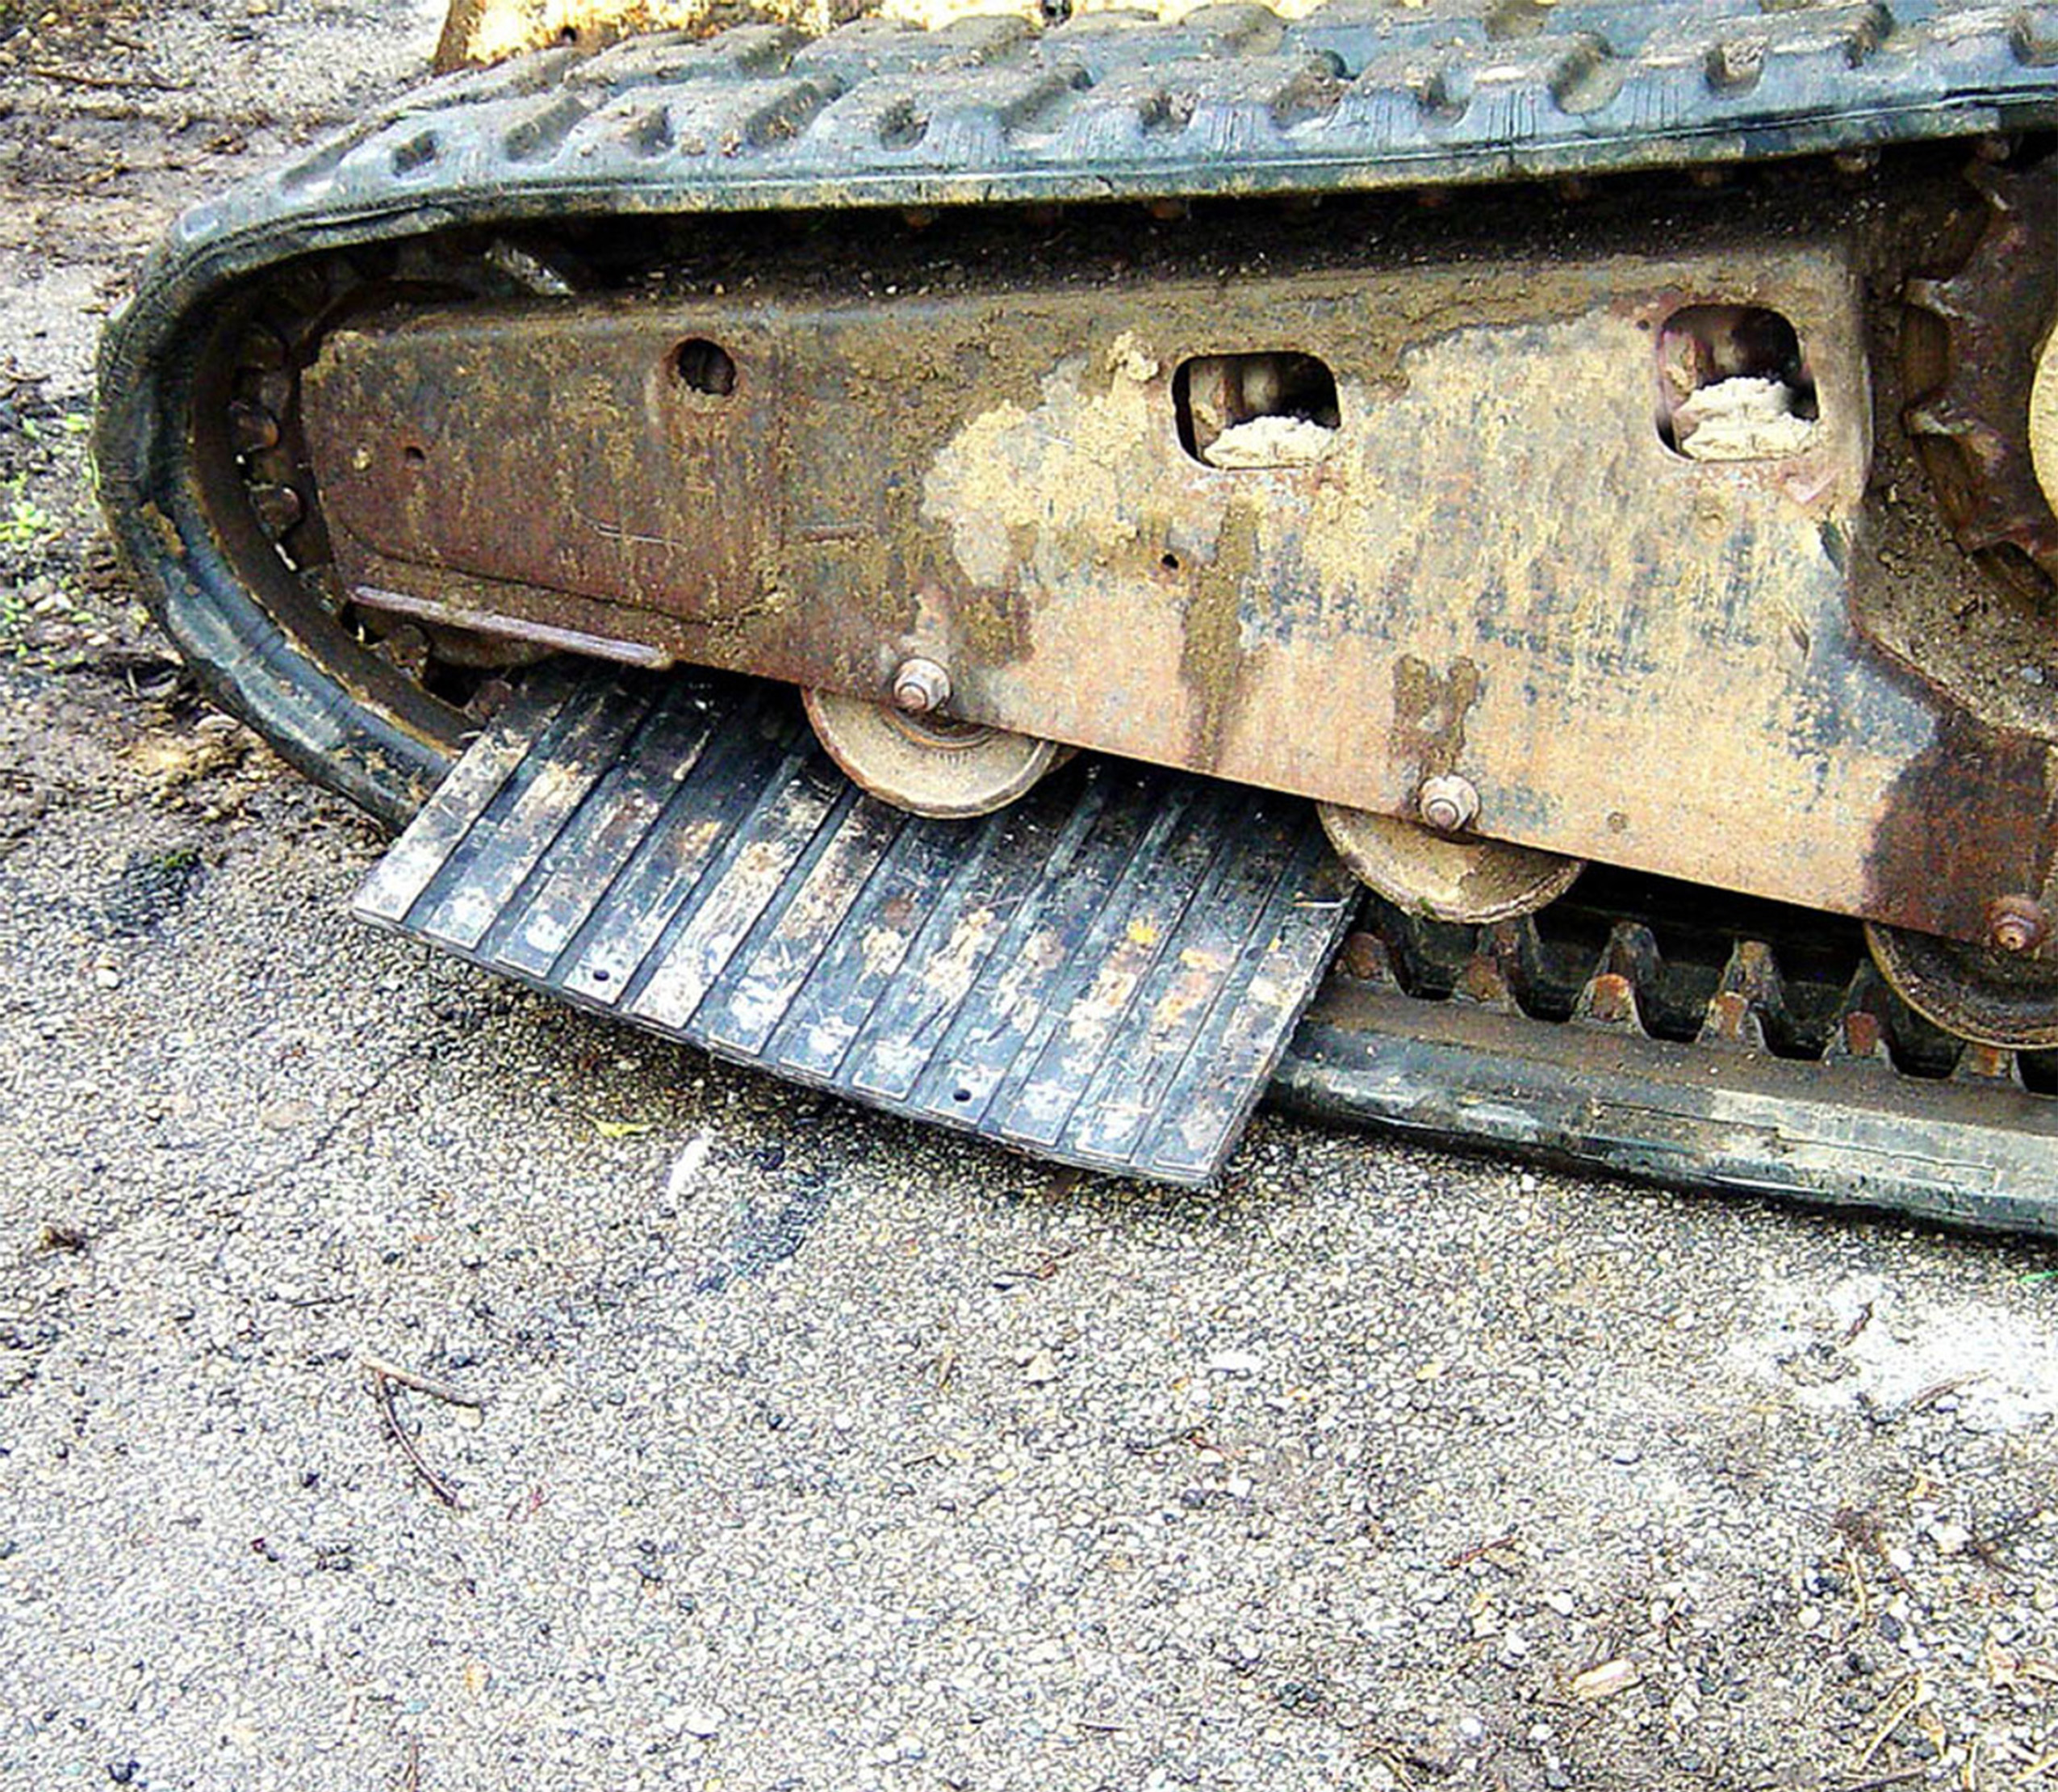
First you need the Armadillo, a flexible reinforced rubber mat (3/4" thick) with hot rolled steel bars that are securely fastened to both sides.
The Power Bar is a 42" Steel pry bar with an ergonomically shaped handle. You can use it just fine without the Hammer Head attachment and still get the right amount of leverage you need for moving heavy tracks around.
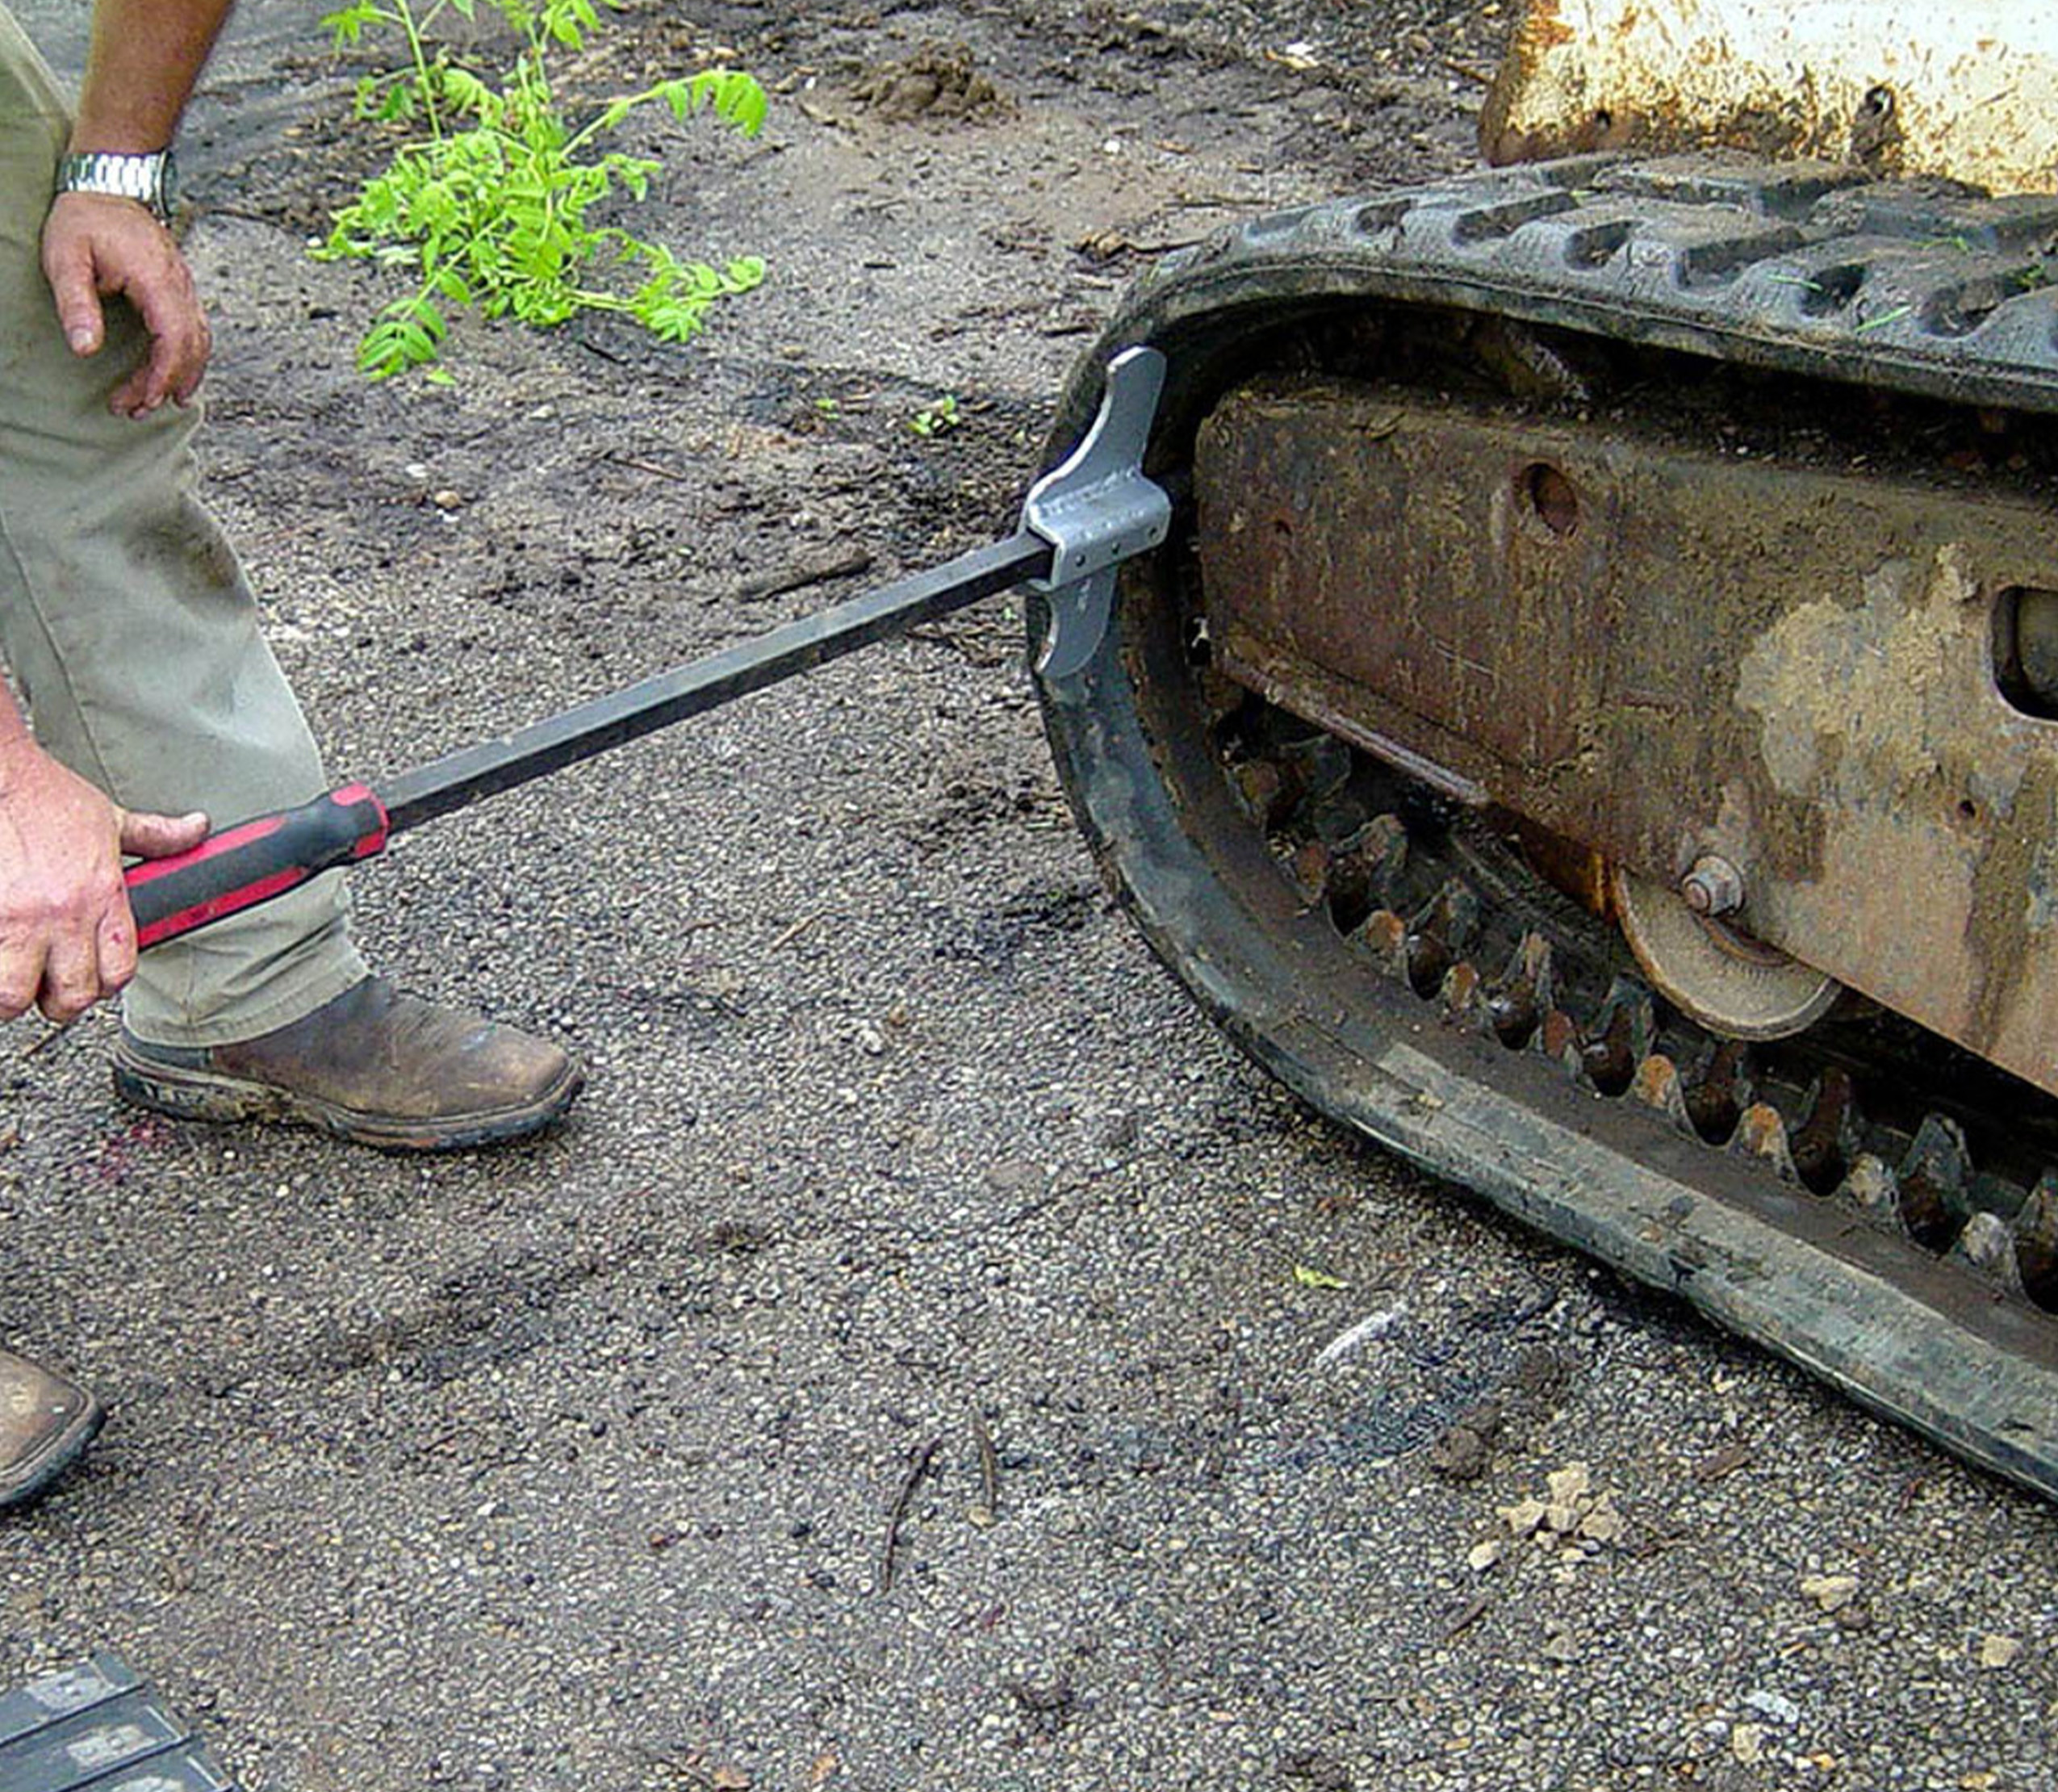
The Hammerhead is a uniquely shaped steel attachment that mounts onto the Power Bar with inset screws that securely tighten to the bar. When attached to the Power Bar, this tool makes pulling tracks off and prying them back onto the idler or sprockets much safer because it creates even more leverage points for you.
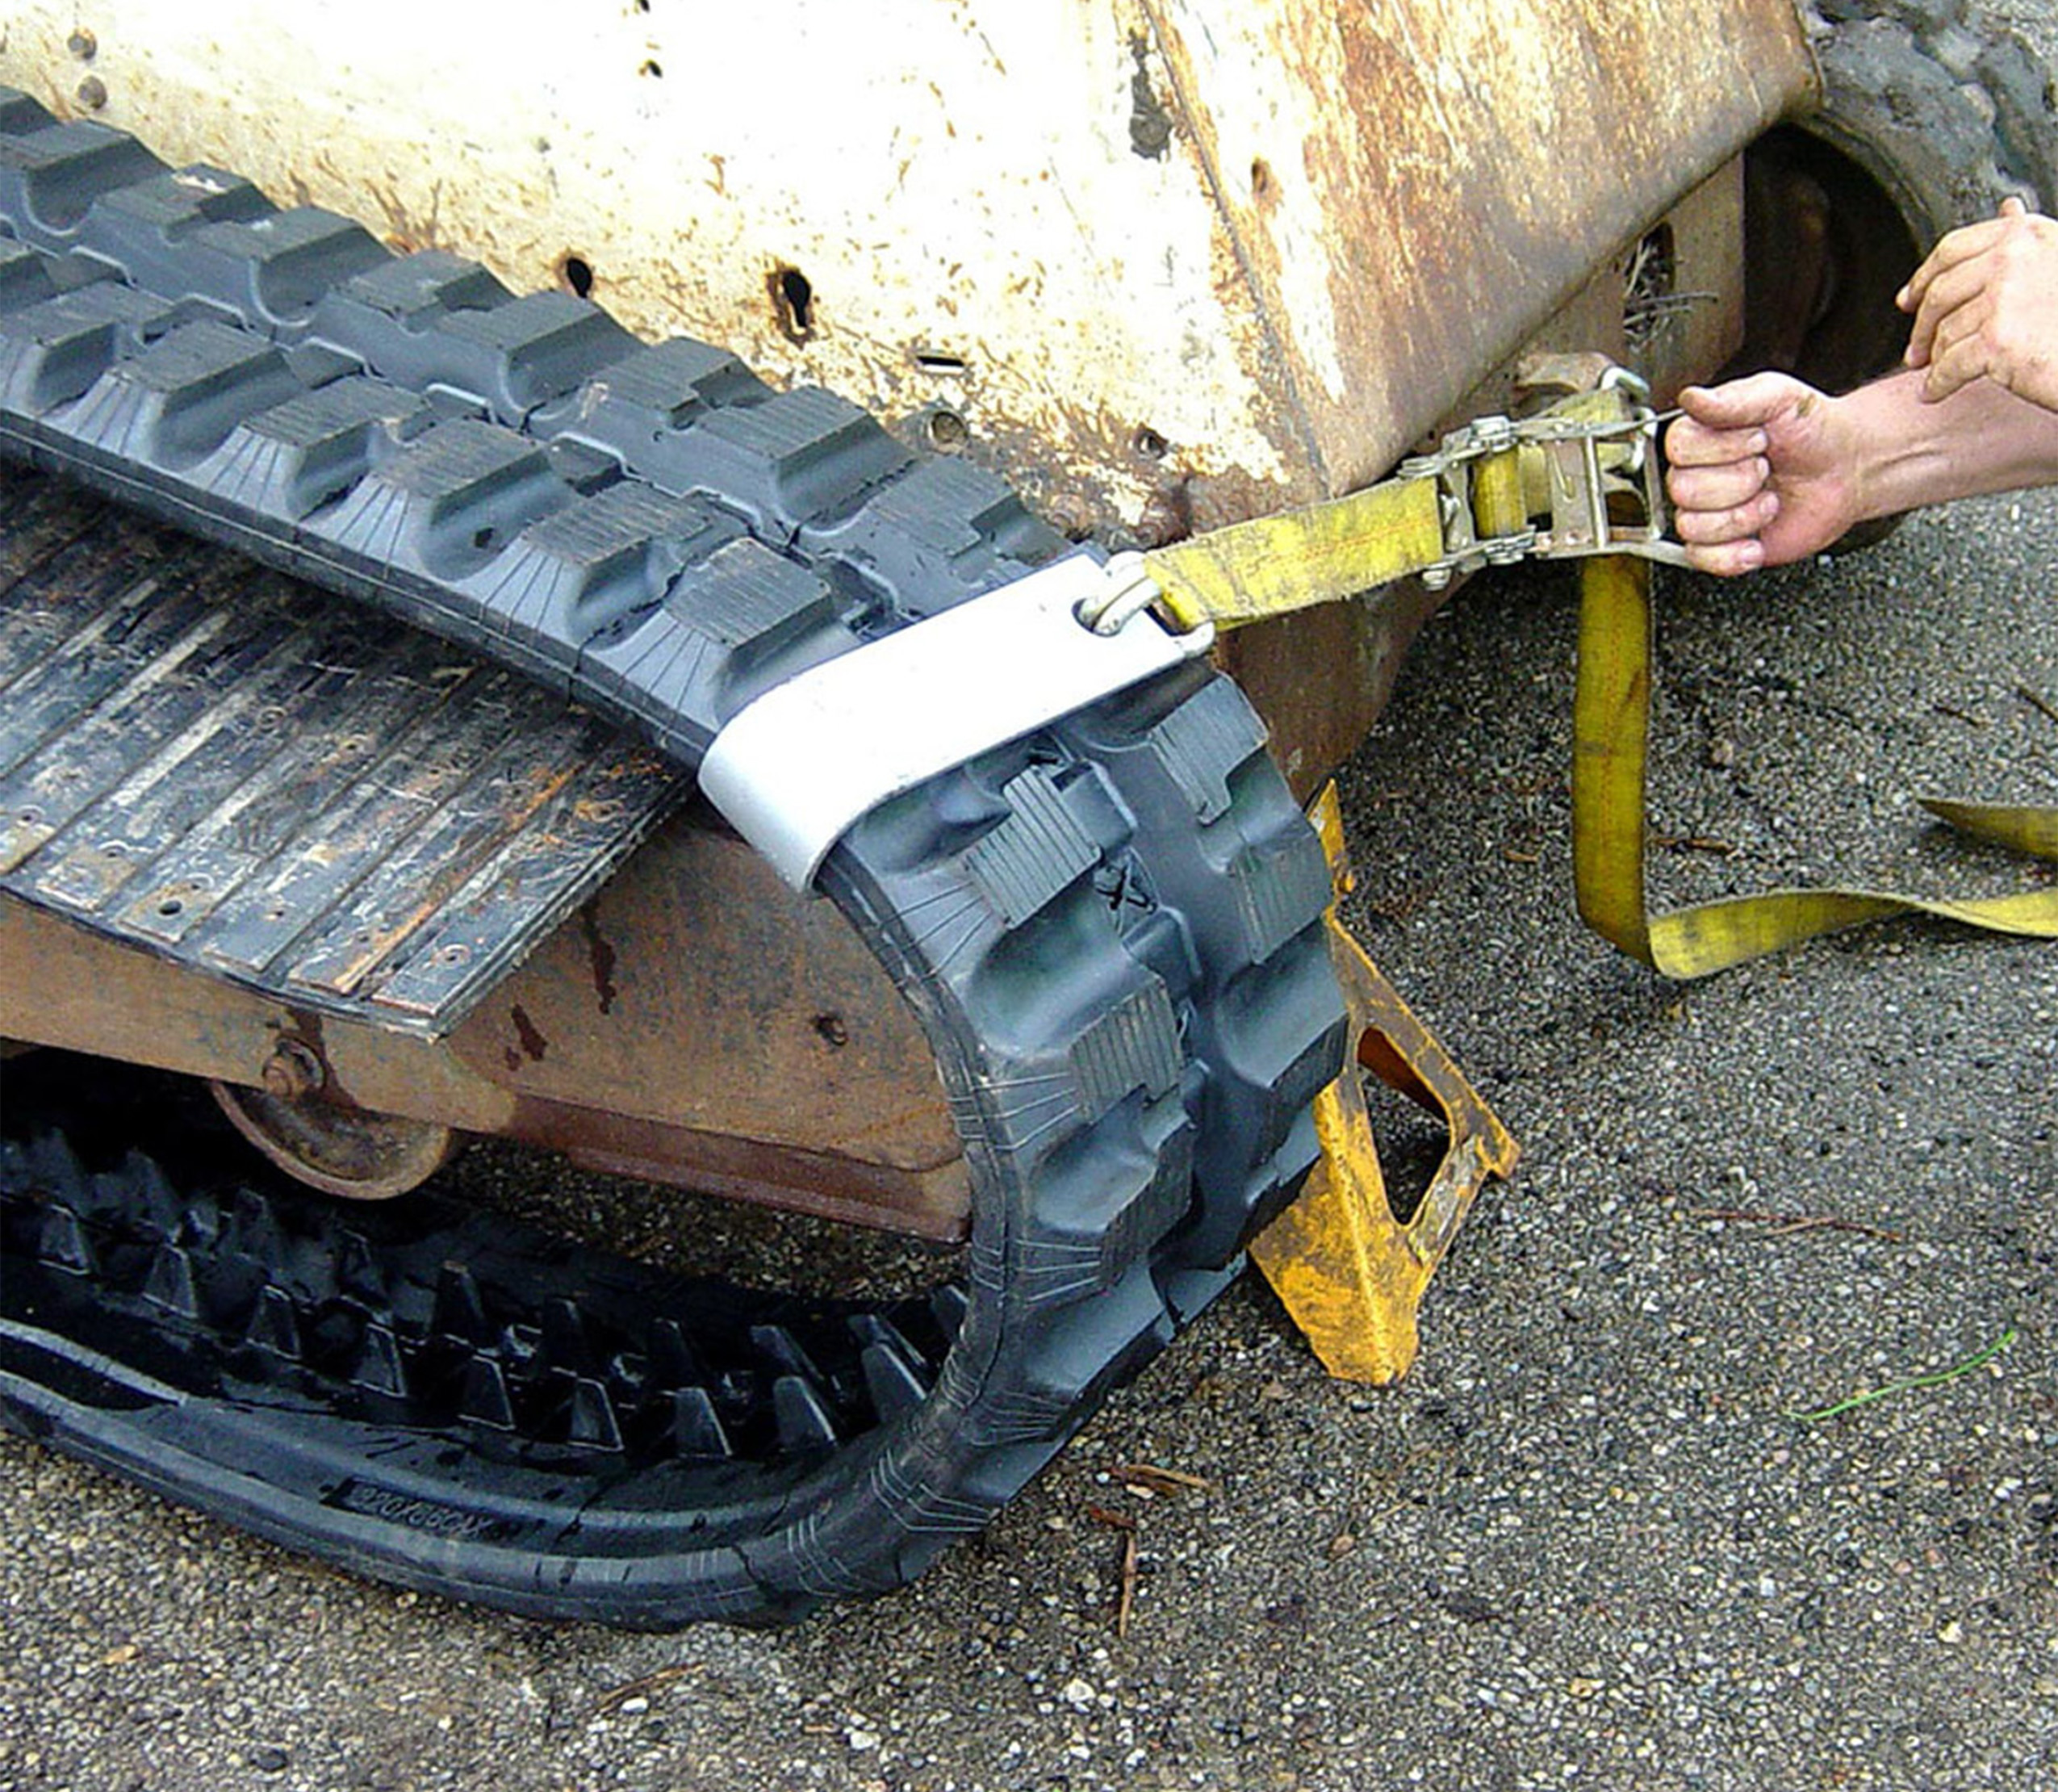
The Beaver Tail is a uniquely shaped, cold rolled steel gripping tool used with a ratchet strap to apply pressure to pull the track back in place on the idler. This greatly reduces the work of manually handling the tracks back onto the machine
A standard Nylon Ratchet Strap with double hooks for better attaching the Beaver Trail, 1000 lbs. capacity. 1.5" strap width.
Here’s How to Use It
First, carefully slide the Armadillo mat between the inside of the track and the idler. Fire up the machine and slowly move the track forward to allow the mat to create space between the rollers. This will loosen the lugs and make it easier to pry the track off.
Next, grab the Power Bar and attach the Hammerhead. Position it in the lugs and slowly start to work the track off. Then go back and pry the lugs from the sprockets. Be careful and pay attention so that you don’t damage any components.
Now, grab the new track and position it next to the machine. Set the armadillo back on the roller and hook the Beaver Tail onto the track. Then, tighten your ratchet strap around the Beaver Tail until it is aligned on the sprockets. Slowly, move the track forward until it is set into place, the Armadillo will help to guide it.
Finally, once the Armadillo has moved past the end rollers, pull it out and you’re on your way. Easy as that.
Compatibility
Track Handler products (armadillo mat) are compatible with newer torsion style suspension and rigid suspensions that require a grease fitting to tighten the track. Dis-assembly of the front idler is required for open design undercarriage used on ASV machines and machines using ASV track assemblies.